How to Build a Narrow Entryway Console Table
A narrow entryway console table adds a useful landing surface and hidden drawer without blocking a small hallway. This plan builds a slim 36-inch table with a lower shoe shelf.
By Practical Wood Plans · Verify every dimension before building.
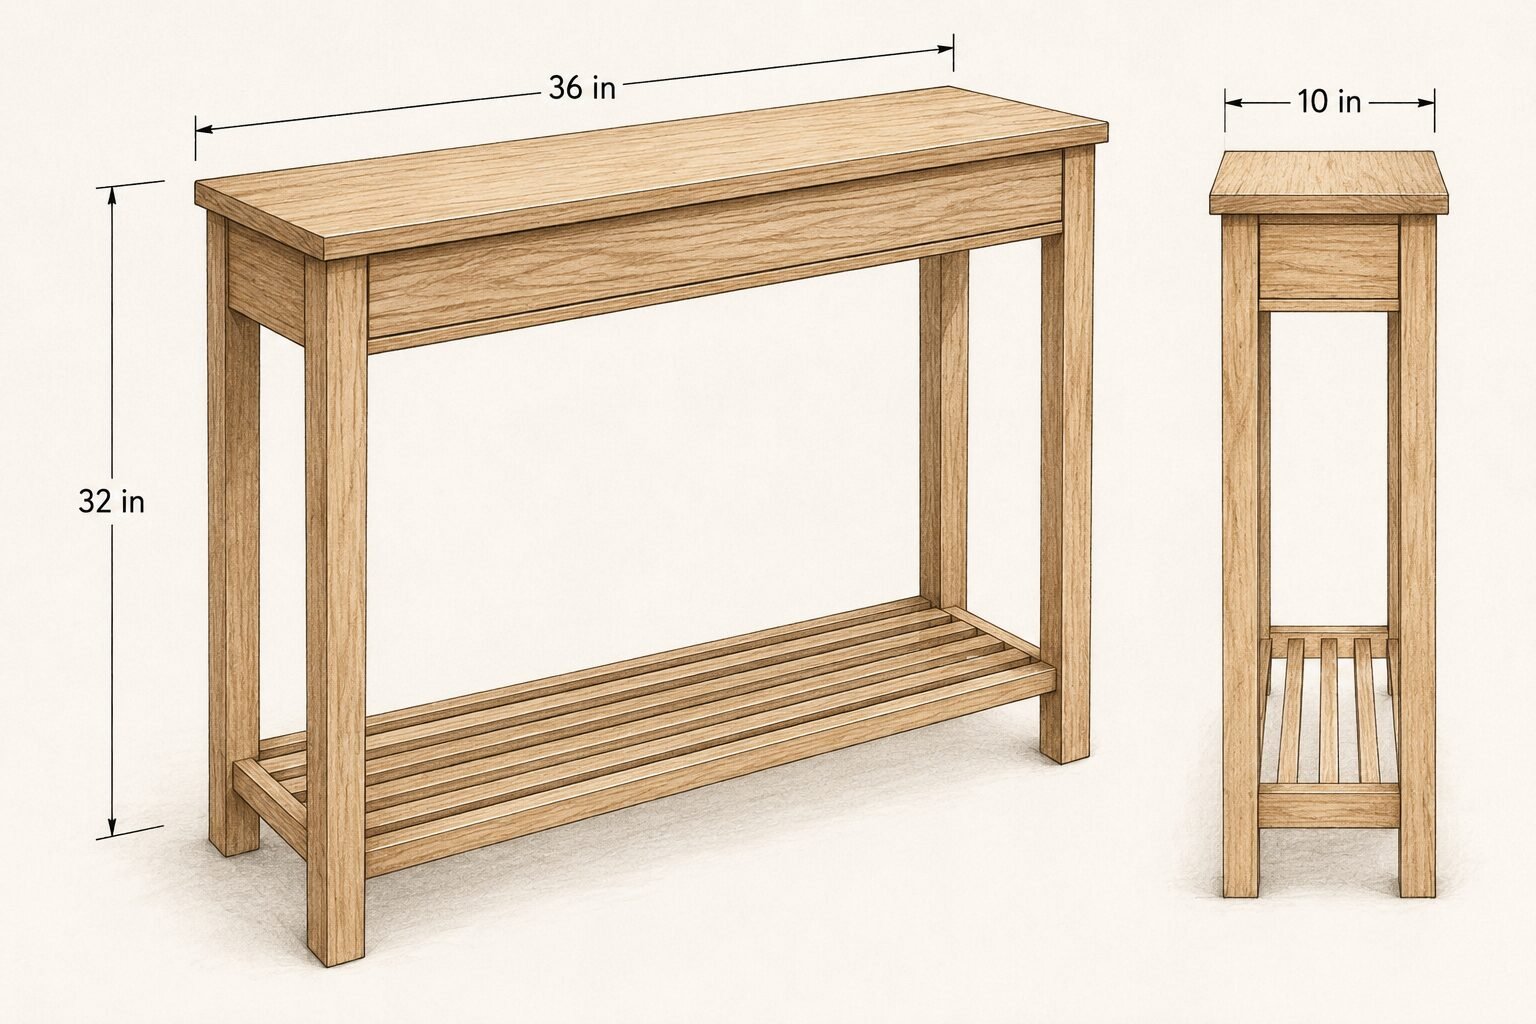
Narrow entryway console table: before you begin
Plan the narrow entryway console table in the real hallway so doors, switches and the normal walking path remain clear.
Read the complete project once and compare its finished size with the real location. Measure the actual material and hardware instead of relying only on nominal sizes. Prepare a flat assembly surface, label every part and practice unfamiliar cuts on scrap.
Materials for a narrow entryway console table
Straight stock and accurate drawer hardware are essential because a narrow entryway console table shows small alignment errors along its long, shallow frame.
- Flat cabinet-grade plywood or straight, dry hardwood
- Project-appropriate hardware, screws and wood glue
- Saw with a sharp suitable blade and drill/driver
- Square, tape measure, clamps and sanding equipment
- Eye, hearing and dust protection
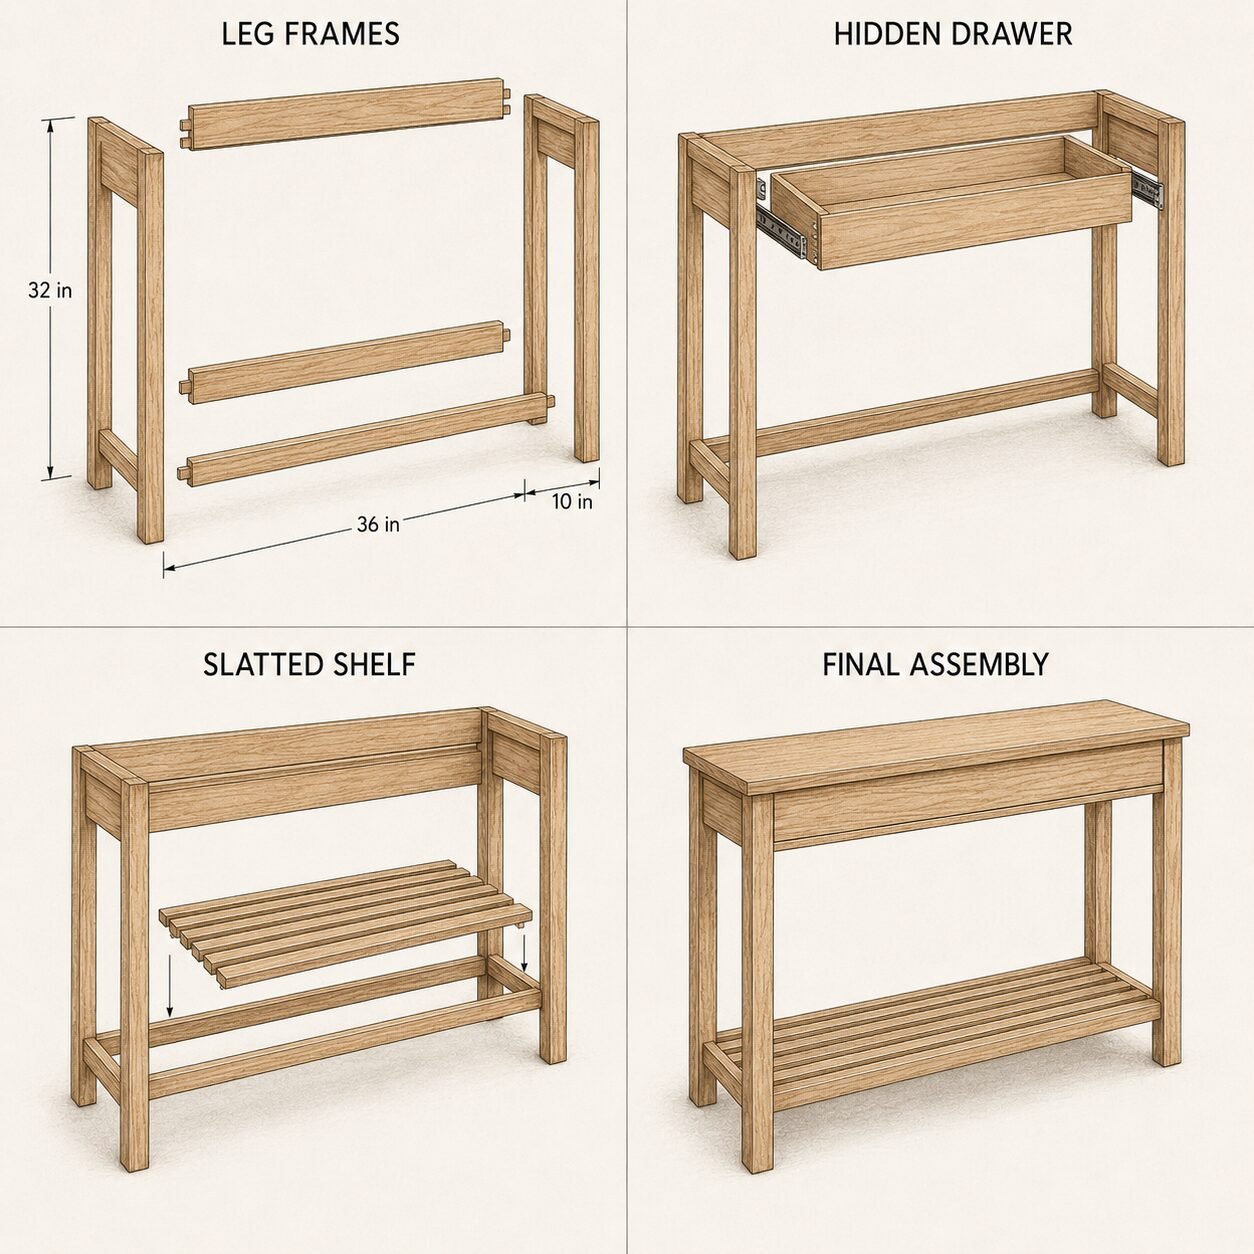
1. Plan the proportions and clearances
The footprint of a narrow entryway console table must be tested before cutting so its depth and height feel comfortable in daily use.
Tape a 36-by-10-inch rectangle on the floor and confirm that doors, baseboards and walking routes remain clear. Measure the actual drawer-slide thickness before deciding the space between the front and back rails. The narrow depth makes careful squaring especially important.
Use painter’s tape to mark the 36 × 10 in footprint in the entryway. Open the nearby door fully and confirm that the 32 in top height will not interfere with switches, trim or the normal walking path.
2. Build two matching leg frames
Cut all four legs from the same straight board when possible. Mark a common reference face, clamp paired legs together and transfer the rail locations at once. Assemble each end frame on a flat surface and compare diagonals before the glue sets.
Cut both pairs of legs together and use one stretcher layout as the master for the second frame. Clamp each frame over the same setup blocks so the rails finish at identical heights.
3. Connect the frames and add the slatted shelf
Join the end frames with the long upper and lower rails. Use equal spacer blocks to position the shelf slats and leave small gaps that allow dirt to fall through. Check the base for rack before installing the final slat.
Join the front and back frames on a flat floor, then check diagonals before fixing the lower slats. Space the slats with one repeatable gauge block so the shelf looks intentional from every angle.
4. Fit the concealed drawer
Build a shallow square drawer box and install both runners from one level reference line. Use temporary screws in the slotted holes, test the travel and adjust the front reveal before adding the remaining screws.
Build the drawer to the actual opening after the base is square. Follow the slide maker’s side-clearance specification and install both runners from the same level reference line.
5. Attach the top and finish
Center the top with an even overhang. Use fasteners that allow seasonal movement when the top is solid wood. Ease sharp edges, sand with the grain and test the chosen finish on an offcut before coating the furniture.
Center the top with equal end overhangs, fasten it through elongated holes or figure-eight fasteners and complete the final sanding in the direction of the grain. Test the drawer again after the finish cures.
A narrow entryway console table often looks uneven when the two leg frames differ or the drawer slides are installed from different reference lines.
Common mistakes to avoid
- Building from nominal sizes without measuring the real stock and hardware.
- Moving the reference edge between related parts.
- Skipping the dry fit before glue or final fasteners.
- Forcing a twisted assembly instead of locating the inaccurate component.
- Applying finish before movement and load tests are complete.
Safety and final inspection
Support every workpiece, disconnect power before changing blades or bits and follow the instructions supplied with tools and hardware. Inspect fasteners, sharp edges and moving parts before use. Wall-mounted work must be fixed to a verified structural substrate; ask a qualified person when the wall construction or expected load is uncertain.
This narrow entryway console table can be resized, but the drawer opening, shelf slats and top overhangs must change together.
For general machine and workshop hazards, consult the OSHA woodworking safety guide.
Frequently asked questions
Can I change the dimensions?
Yes, but update every connected part together and recheck spans, clearances, hardware travel and stability before cutting.
Is this suitable for a beginner?
A careful beginner can complete the project after practicing critical joints on scrap. Moving and wall-mounted hardware deserves extra review.