How to Build Rolling Under-Bed Storage Drawers
Under bed storage drawers create useful hidden space without adding another cabinet. This plan builds two low rolling plywood drawers with recessed pulls, reinforced caster corners and dust-conscious storage.
By Practical Wood Plans · Verify every dimension before building.
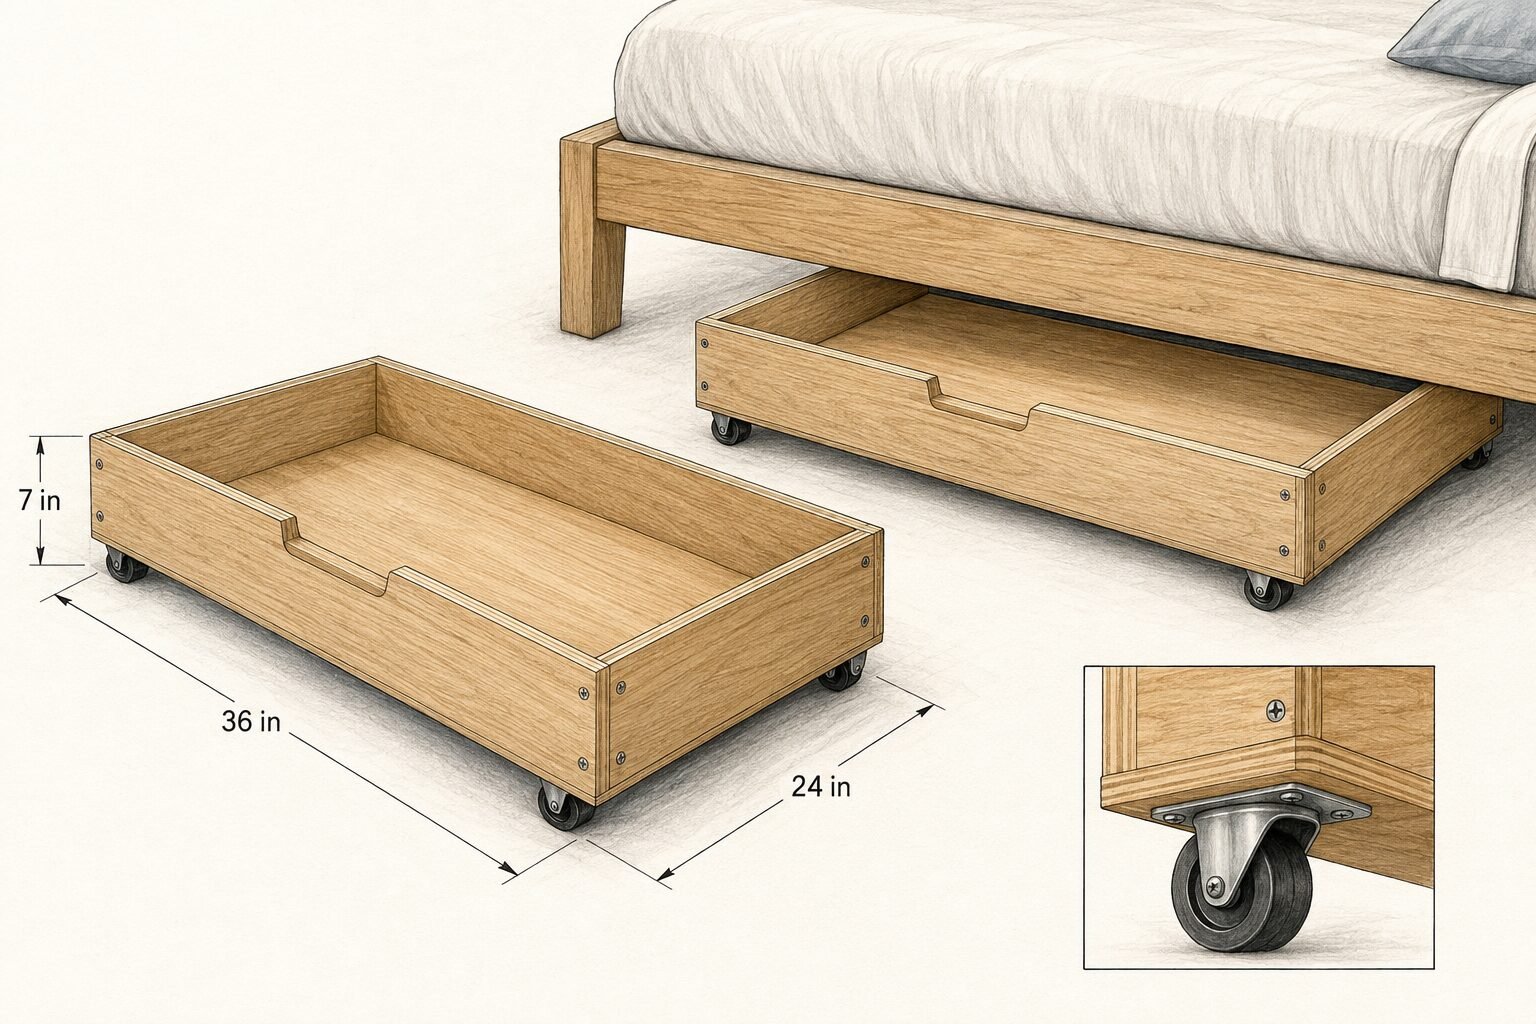
Under bed storage drawers: before you begin
Before building under bed storage drawers, read the complete project once and compare its finished size with the real location. Measure the actual material and hardware instead of relying only on nominal sizes. Prepare a flat assembly surface, label every part and practice unfamiliar cuts on scrap.
Materials for under bed storage drawers
- Flat cabinet-grade plywood or straight, dry hardwood
- Project-appropriate hardware, screws and wood glue
- Saw with a sharp suitable blade and drill/driver
- Square, tape measure, clamps and sanding equipment
- Eye, hearing and dust protection
1. Measure the real space beneath the bed
For under bed storage drawers that roll reliably, measure from the floor to the lowest bed obstruction at several points. Subtract caster height, bottom thickness and a practical clearance margin. Check rugs, center supports and uneven flooring before fixing the final box height.
Measure at the lowest point beneath the frame and subtract at least 1 in for easy rolling clearance. Check the path from the bed to the open floor so the drawer can be removed without hitting a wall or nightstand.
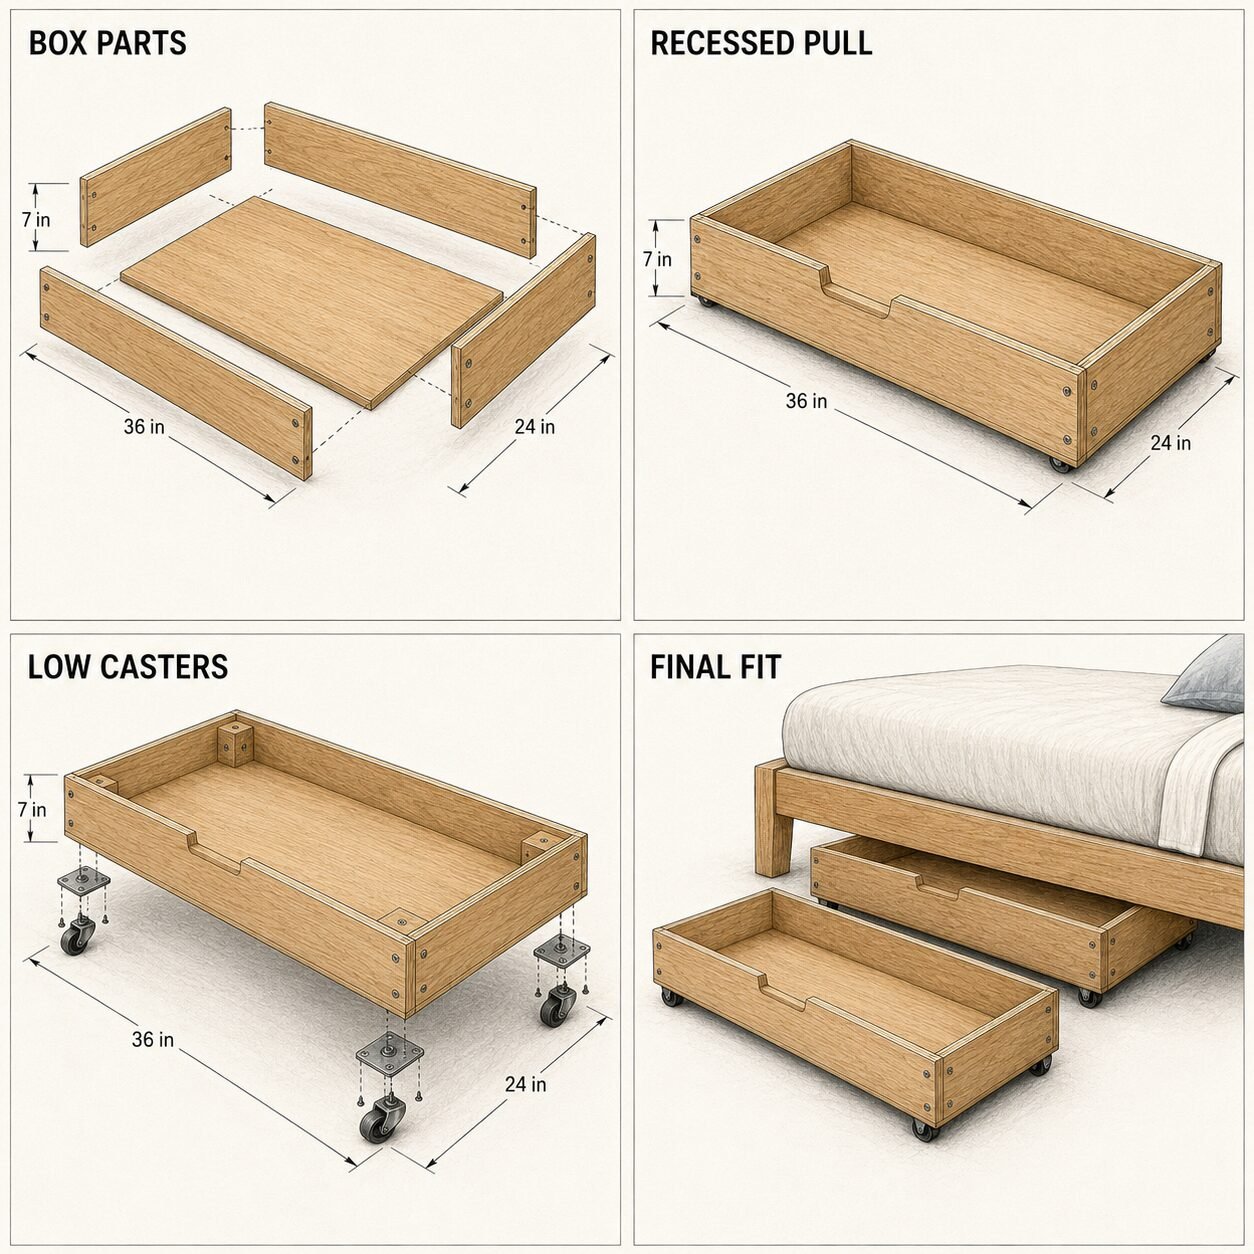
2. Cut and label the box parts
Use flat plywood for under bed storage drawers and support the full sheet while cutting. Label the front, back, sides and bottom as soon as they are cut. Matching boxes look better when corresponding parts are cut together from the same setup.
Break down the sheet with the factory edge used as a common reference, then mark mating corners before assembly. A labeled stack prevents the two long sides from being confused with the shorter front and back pieces.
3. Assemble a square low box
For rigid under bed storage drawers, fasten the sides around the bottom or into a captured groove according to the chosen construction. Use corner clamps, compare diagonals and confirm that the long sides remain straight; a twisted box will track poorly under the bed.
Assemble on a flat surface, clamp the corners and compare diagonal measurements before the glue sets. Fit the bottom only after the box is square so it locks the assembly in the correct shape.
4. Reinforce and mount the casters
Add solid blocking under bed storage drawers at all four caster positions so the screws do not rely on thin plywood alone. Keep every caster the same distance from the edges and verify that the wheels rotate without rubbing the sides.
Place the casters near reinforced corners rather than fastening them into unsupported thin plywood. Use identical casters and confirm that every wheel rotates freely before loading the drawer.
5. Shape the pull and test the final fit
Lay out the recessed pull symmetrically, drill clean starter holes and smooth the cutout carefully. Load each under bed storage drawer gradually, roll it across the actual floor and add felt or a dust cover if stored textiles need extra protection.
Round over the hand opening, sand it smooth and test the drawer with bedding or clothing inside. Confirm that the loaded box rolls straight and still clears the lowest bed rail.
Common mistakes to avoid
- Building from nominal sizes without measuring the real stock and hardware.
- Moving the reference edge between related parts.
- Skipping the dry fit before glue or final fasteners.
- Forcing a twisted assembly instead of locating the inaccurate component.
- Applying finish before movement and load tests are complete.
Safety and final inspection
Support every workpiece, disconnect power before changing blades or bits and follow the instructions supplied with tools and hardware. Review the OSHA woodworking safety guidance before using unfamiliar machinery. Inspect fasteners, sharp edges and moving parts before use. Wall-mounted work must be fixed to a verified structural substrate; ask a qualified person when the wall construction or expected load is uncertain.
Frequently asked questions
Can I change the dimensions?
Yes, but update every connected part together and recheck spans, clearances, hardware travel and stability before cutting.
Is this suitable for a beginner?
A careful beginner can complete the project after practicing critical joints on scrap. Moving and wall-mounted hardware deserves extra review.